Category Archives: decor

our first thanksgiving at home

DSC_3173 copyWEBYesterday we had our first Thanksgiving at home. We planned a small gathering since it was just us four and my parents who are in town. Kind of last-minute, which is how things happen most of the time around here despite all my efforts to be organized {but that’s another story}, we invited over two foreign EF Academy students. The school places students that have no family or close friends for special occasions like these, with local families as part of their programs and as a way for students to experience American traditions. Ours it not exactly a typical American family but we are so grateful to be able to celebrate this important holiday and so we wanted to open our home and share our first Thanksgiving at home with them.

DSC_3176 copyWEBDSC_3194 copyWEB

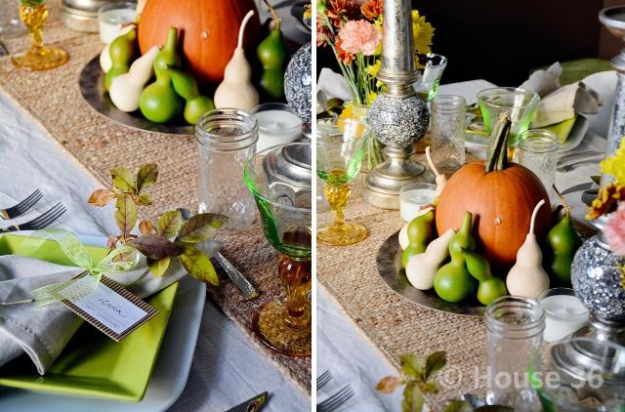
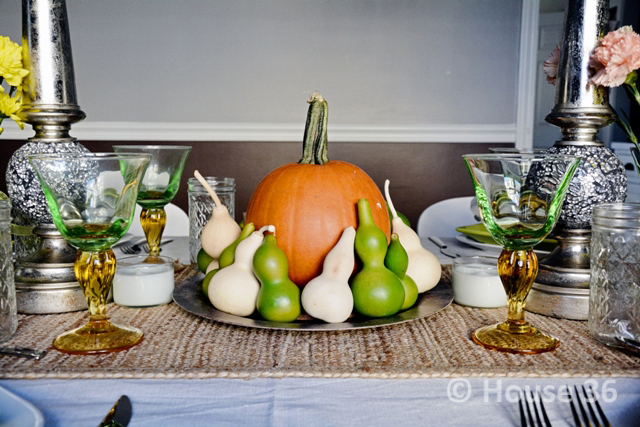
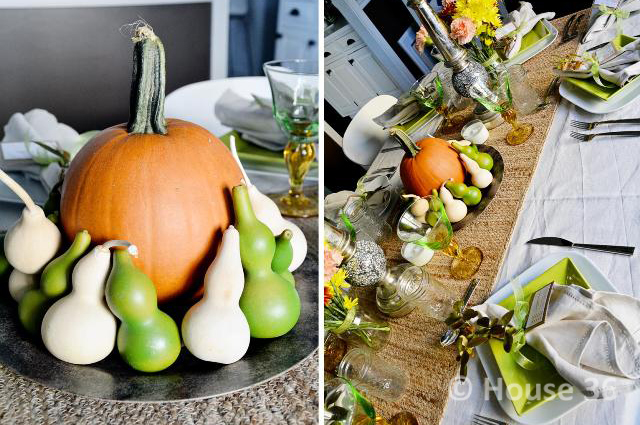
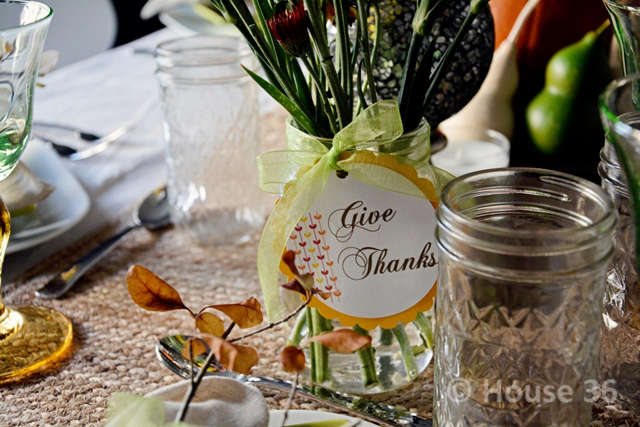
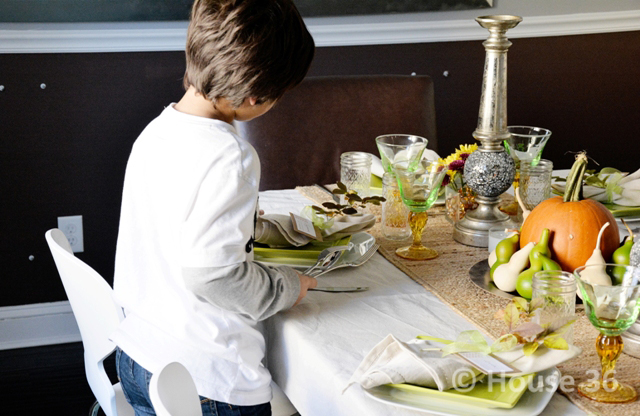
I had some green plates and cups so I decided to use them for our tablescape. The center piece was a real pumpkin I borrowed from the Entry Hall console, with some little fake gourds I had already. Fresh flowers placed in little mason jars with little tags. For place cards I used pieces of corrugated card stock and a Thanksgiving place card I found online. I tied the napkins with green ribbon and added some leafs from our yard, that L helped picked up.
DSC_3179 copyWEB DSC_3181 copyWEB DSC_3184 copyWEB DSC_3186 copyWEB

As I mentioned yesterday my mom cooked a delicious Thanksgiving meal for all of us. I helped a little and took lots of notes {I may attempt to cook Thanksgiving dinner next year!}. While Nona cooked, L and I set up the table, Nono entertained G and M just hang out.

DSC_3156 copywebPublication11web

{I don’t have many pictures of our feast because well, I was busy eating!}

Publication23

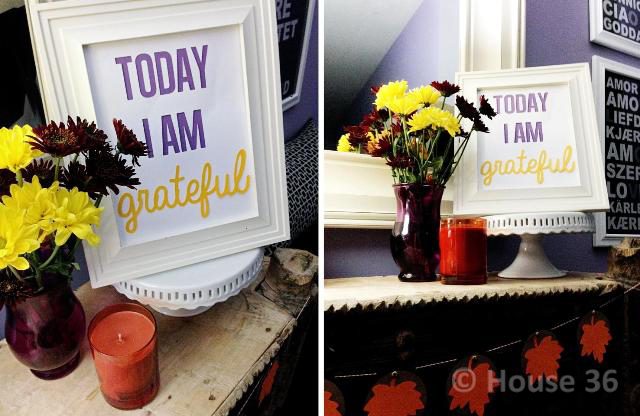
{I never got a change to take pictures of our Entry Hall Thanksgiving decor, just have these two pics from my iPhone. I made the sign and leaf pennant with my Silhouette Portrait machine}

After we ate, we just relax and watched some reruns of the Macy’s parade. G skipped his nap so he went to bed very, very early. After L and I watched a movie, and after both kids were in bed, the adults watched another movie. It was a simple, small but beautiful Thanksgiving Day!
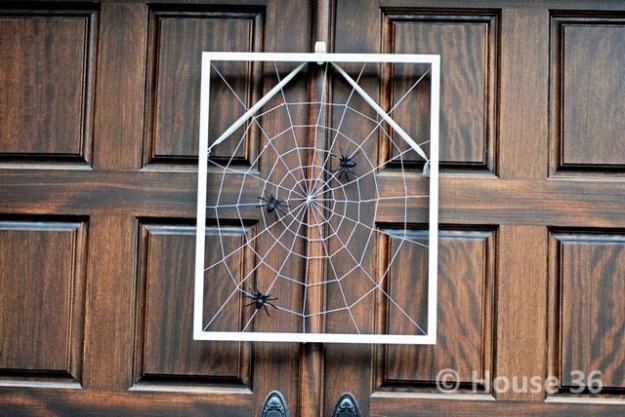
thanksgiving decor

Last year from Halloween decor I jumped to Christmas decor. I completely skipped Thanksgiving. We were going to spend Thanksgiving in Boston, so it didn’t make sense {to me} to decorate if we were not going to be around.

This year is different. My parents are coming to visit and we’ll spend Thanksgiving together. We’re not sure about our plans yet but still I think it’ll be nice to have some Thanksgiving spirit going on. Especially since this is a Holiday we don’t celebrate in my home country. After 8 years in the United States I have learned to appreciate this celebration and understand its meaning and I’m sure my parents will like to learn more about the story and traditions behind it.

untitled1{image via blovelyevents}

Rustic-Fall-Vignette-5-by-@tarynatddd{image via design, dining and diapers}

untitled{image via paper crave}

IMG_1824{image via proverbs31girl}

Original_Mantel-Decorating-Grace-Light-Thanksgiving_s4x3_lg{image via hgtv}

I tend to lean towards simple, modern, clean decor most of the time. I think a few details will be more than enough to commemorate this special day. I’ll work on it on the weekend, so it’s ready when Nona arrives. Let’s see what I come up with.

halloween around our home

Just some pictures of our Halloween decor this year. This year I kept the festive decor to the entry hall and dining room. I re-used most of last year decorations. They were in good shape and I didn’t have time to make new things. I think it worked and everything looks completely different.

DSC_0999 copyWEB DSC_1000 copyWEB_edited-1{ card stock bats }

I love our card stock bats. It was such an easy project yet makes a big impact. Last year our friends the bats visited us in our dining room and gallery wall {you can see them here}. These year they migrated to the hall. The sweetest thing was the next morning after putting these little guys up {I did it at night while the boys were sleeping}. L and G were coming down the stairs when I heard L say “Look G, bats” and G responded “Wow, bats! Cool”. So cute! DSC_1231 copyWEBDSC_1224 copyWEB_edited-1 DSC_1243 copyWEB_edited-1{ halloween gallery art }

What an easy way to decorate for this occasion with a Halloween gallery art. No, I didn’t make nor print new Halloween art or photos. I just re-used my last year Halloween printables and some Halloween scrap booking paper I got on sale. And I didn’t take the frames down and switch photos/pictures {who has the time!}. No, I just taped them on top of the glass with painters tape. To disguise my lazy approach I added some white web around. The final touch, twisting the frames. Last year Spider Web art ended here, too.

DSC_1229 copyWEB DSC_1249 copyWEB{ halloween pennant }

I used the “BOO” signs from last year’s party {you can see it here} to make a new Halloween pennant. I added a back layer {spider web paper trays I got at the Christmas Store last year} to make it a little more interesting. I completed the look with a few things I had around. L carved a pumpkin last weekend at a local Fall festival. I’m honestly not a big fan of real pumpkins, but I had to include it in our decor since my boy made it. I also repeated last year stripped candle project, this time with skinny, tall candles.

We’re having a little Halloween party for some family and friends tomorrow so I still have more decorating to do!

our little halloween project in Oh my! creative

Yesterday Susan from Oh my! creative featured our one and only 2013 Halloween project. I’m really flattered she picked my Spooky Door Knockers  among so many other amazing ideas.

Head over there and check out all the amazing and creative crafts. Sometimes I find it mind-blowing how many imaginative, artistic, talented people are out there. Really, I wish my days had extra hours just to browse away and navigate through some much inspiration.

I warn you. Be sure you have time on your hands when you visit her site because you’ll stay glued to your screen. You’ll be inspired. So many ideas, so many projects!

DSC_0899 copy1Halloween Door Knocker

Tomorrow I’ll be sharing our Halloween decor this year. So stay tuned!

halloween decor {on a budget} – chic spooky door knockers

DSC_0883 copyWEB I mentioned in my last post that this year I re-used most of our Halloween decorations, just switching things around a bit and relocating everything. The Halloween wreath and Spider Web art ended up somewhere else in the house, leaving the front doors empty.

I was at the Dollar Store the other day looking for something I could use for the front door, when I saw these spooky plastic door knockers. I immediately remembered this cool project I ran into while browsing some Halloween linky parties last week. Not sure why, but I just grabbed one knocker {the skull} even though we have double entry doors {I guess I thought I was just going to see how it came out first}. Since I couldn’t find a frame I like I picked a mirror, thinking it’d make the project a little more interesting {and it did}.

I gave the mirror frame some coats of white spray paint and used gold for the knocker. I attached the plastic knocker to the mirror with super glue and used command hooks to hang it on the door. I liked the result so I went back to the store to get another skull door knocker. Of course they didn’t have any more. I grabbed a mummy instead. Ideally they’d match but whatever. I still like them.

DSC_0886 copyWEB_edited-1 DSC_0901 copyWEB DSC_0891 copyWEBDSC_0902 copyWEBI like this little project a lot. It’s a good alternative to the classic “front door wreath”. I like wreaths, too, but sometimes it’s nice to think outside the box and do something more original and unique. You can use different frame types and sizes, different backgrounds {fabric, paper, etc}. The possibilities are endless.

The whole project cost $4 dollars and took me about half hour to make. You can’t beat that, right?

Linking up with Sugar and Dots, Polkadots on Parade, Ginger Snap Crafts, Made in a Day, Oh my Creative, 52 mantels.

halloween decor {on a budget} – 2012 projects recap

DSC_1208 copyWEBLast year I did a mini series about chic Halloween decor on a budget and shared a few projects I did to decorate our home for this spooky holiday. Most of the decorations were still in good shape so it made sense just to re-use them again this year instead of making new stuff. I didn’t, however, want to display the decorations the same way I did last year. So I recycled and updated them a little and changed their place.

I figured to get into Halloween mood and before sharing my new re-purposed and recycled Halloween decorations and because I haven’t taken pictures yet, I’d make a little recap of my favorite projects from last year.

DSC_1006 copyWEB{ spider web art }

DSC_0952 copyWEB{ easy striped halloween candles }

DSC_1219 copyWEB{ free halloween printables }

DSC_1007 copyWEB_edited-1{ $4 halloween wreath }

DSC_0957 copyWEB{ easy newspaper fans and Halloween garland }

I didn’t get to post about these newspaper fans and Halloween garland last year. I made them to hang from our TV in the living room.  For the garland I threaded three different Halloween cut outs {pumpkin, bat & skull} I found at the Dollar Store combined with black, orange and white card stock circles with orange twine. For the paper fans I used some sheets of newspaper and black and orange card stock circles. Here’s a cool tutorial for making paper fans if you need one.

DSC_1218 copyWEB

{ card stock bats }

This was one of the easiest projects we made last year. And I said “we” because L helped by cutting the bat silhouettes. I got the idea from Made but the original idea is from Country Living. They even have Halloween templates you can download here.

Hope you like these little projects and maybe try some of them. Stay tuned for a new quick, easy and extremely budget friendly Halloween project!

valentines around our home

Love is in the air…I couldn’t contain myself and went ahead and decorated our hall. This is the first time I decorated for Valentine’s Day, so I wasn’t sure what to do. After a little brainstorming, I came up with something simple but cute. And of course, with three boys in the house, I had to add a little blue to the obvious red and pink color scheme.

valentines_decor_1 valentines_decor_2 valentines_decor_3 valentines_decor_4The pictures above are just a sneak peek of our Dining Room. I’m hosting a Valentines Play date {actually two!} for my little one and some of his friends this week and this is part of the decor. So excited!

february – febrero

february-13-1024__75-calendar-1920x1200 february-13-like_the_cold_side_of_a_pillow__56-calendar-1920x1440 february-13-happy_valentines_day__42-calendar-1920x1080 february-13-dear_love__82-calendar-1920x1080

{images via smashing magazine}

Oh, February, the moth of love. I always like the first of every month. It’s like a fresh start all over, again and again. The perfect opportunity to set new goals and intentions. {I started this post last Friday, but as you can see, never finished it. Always happen!}

Anyway, one of the big changes this year is I started working part-time. That means I’ll have to be much better at organizing my time {one of my intentions for so, so long and still working at it}, and also, that after almost two years of just me taking care of G, I’ll be needing help. We’re in the process of looking for someone and hopefully we’ll find the right person. Big changes around here!

This month I wanted to decorate the house, just a little, for Valentine’s and throw a little Valentine’s party for my kids. I know we should show our love and appreciation to our loved ones all year round but special days like these are the perfect occasion to do a little extra more to show all that love. And having a house full of boys, it’s the perfect excuse to decorate with some pink here and there.

I’d also like to continue with our home improvement projects so when Spring comes we are better prepared than last year. And I’d also like to keep working on a couple of personal projects that I hope see the light soon.

I’d better go back to work since the month will be gone at a blink of an eye! Here’s for a short, but sweet February.

christmas stockings & paper fans

{Even though it’s been a busy month I’m very glad I was able to complete some of the Christmas projects in my list. Christmas is a few days away so there isn’t much time left here but still wanted to share!}

Last year we didn’t get Christmas stocking for the kids, because we spent the Holidays in Perú and stocking are not really a tradition over there. This year however, I definitely wanted to get them cute Christmas stockings, as it’ll be our first Christmas together at home.

I wasn’t sure what type of stocking to buy, classic, modern? I was indecisive until I saw this picture, from my inspiration post, and well, I felt inspired to attempt to sew stockings. Yes. I decided I wanted to make my own stockings. I googled, found a simple and easy tutorial, went to the craft store to get some fabric and put to work.

christmas_decor_1christmas_stockings_2Also, I was planning on hand stitching the letters, but after I glued them to secure them to the stocking I got lazy and decided to leave them like that. Yes, I like easy and simple.

christmas_decor_4christmas_decor_8christmas_decor_2To finish decorating, I got some red and silver nesting boxes and wrapped a couple of boxes with some leftover wrapping paper, and created and framed a sign saying “A gift for you”. I love, love the way everything looks together, festive, merry, very Christmas-y!

Feliz Navidad a todos!